
Microfrontends Made Simple
Introduction
Why Microfrontends? A Real-World Use Case
What if you were building a massive e-commerce platform that’s constantly evolving? You have multiple teams working on different parts of the site:
- The product team manages the catalog and recommendations.
- The checkout team handles payments and order processing.
- The customer support team builds the help desk and live chat.
Now imagine needing to update the checkout flow in a monolithic frontend architecture. One small change could affect the entire codebase, delay deployments, and cause conflicts with other teams’ work. That’s a nightmare.
This leads to problems such as:
- Deployment bottlenecks caused by tight interdependencies
- Rigidity in choosing the best tools for each feature
- Constant coordination struggles between teams stepping on each other’s toes
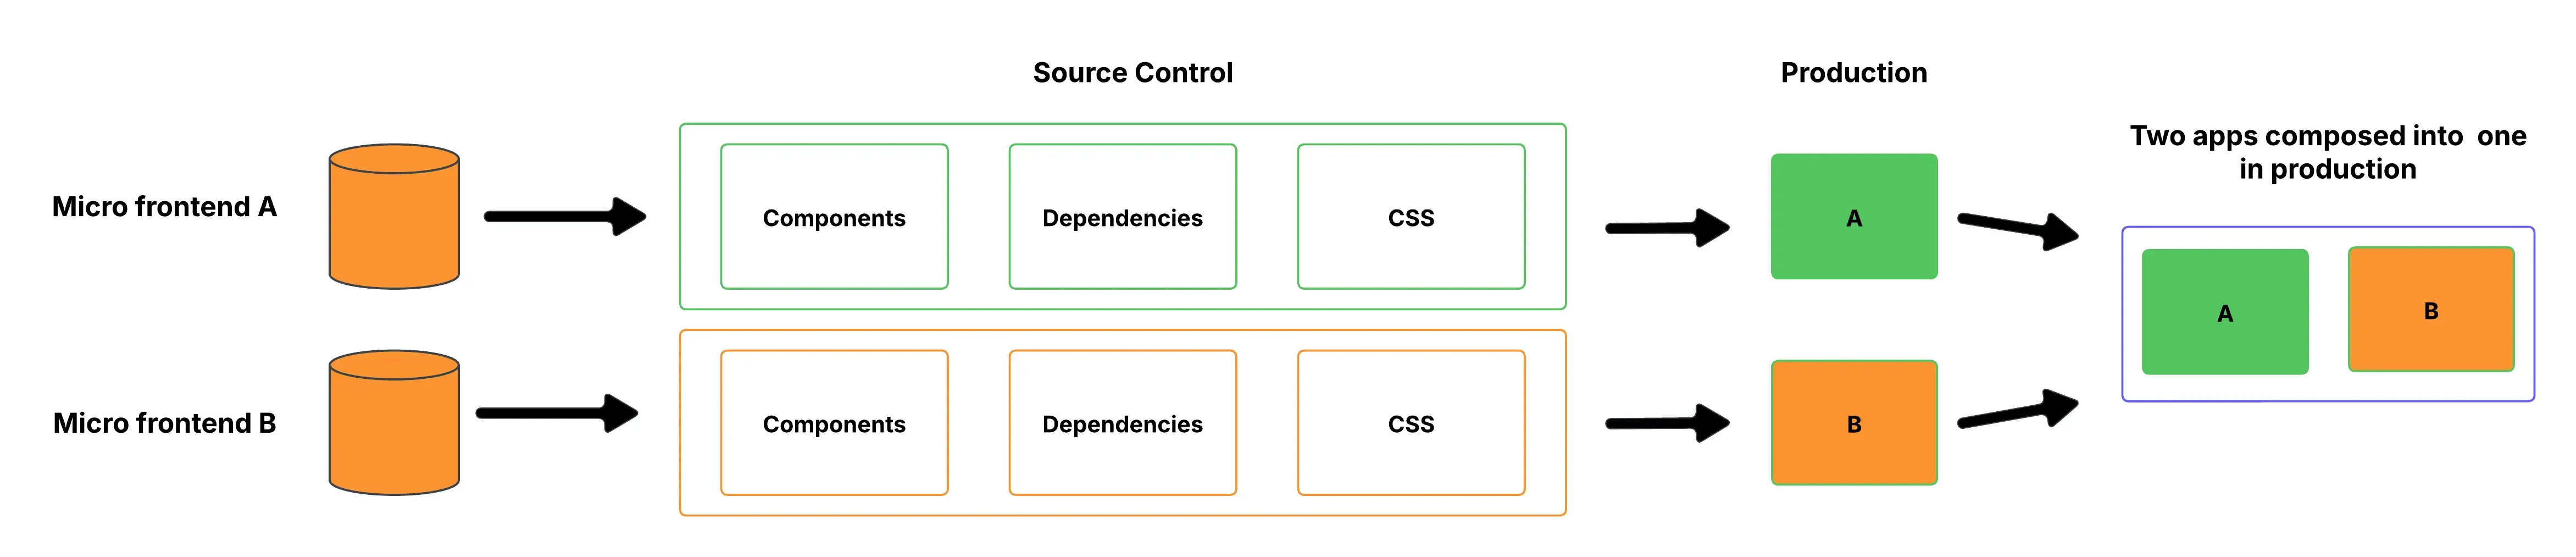
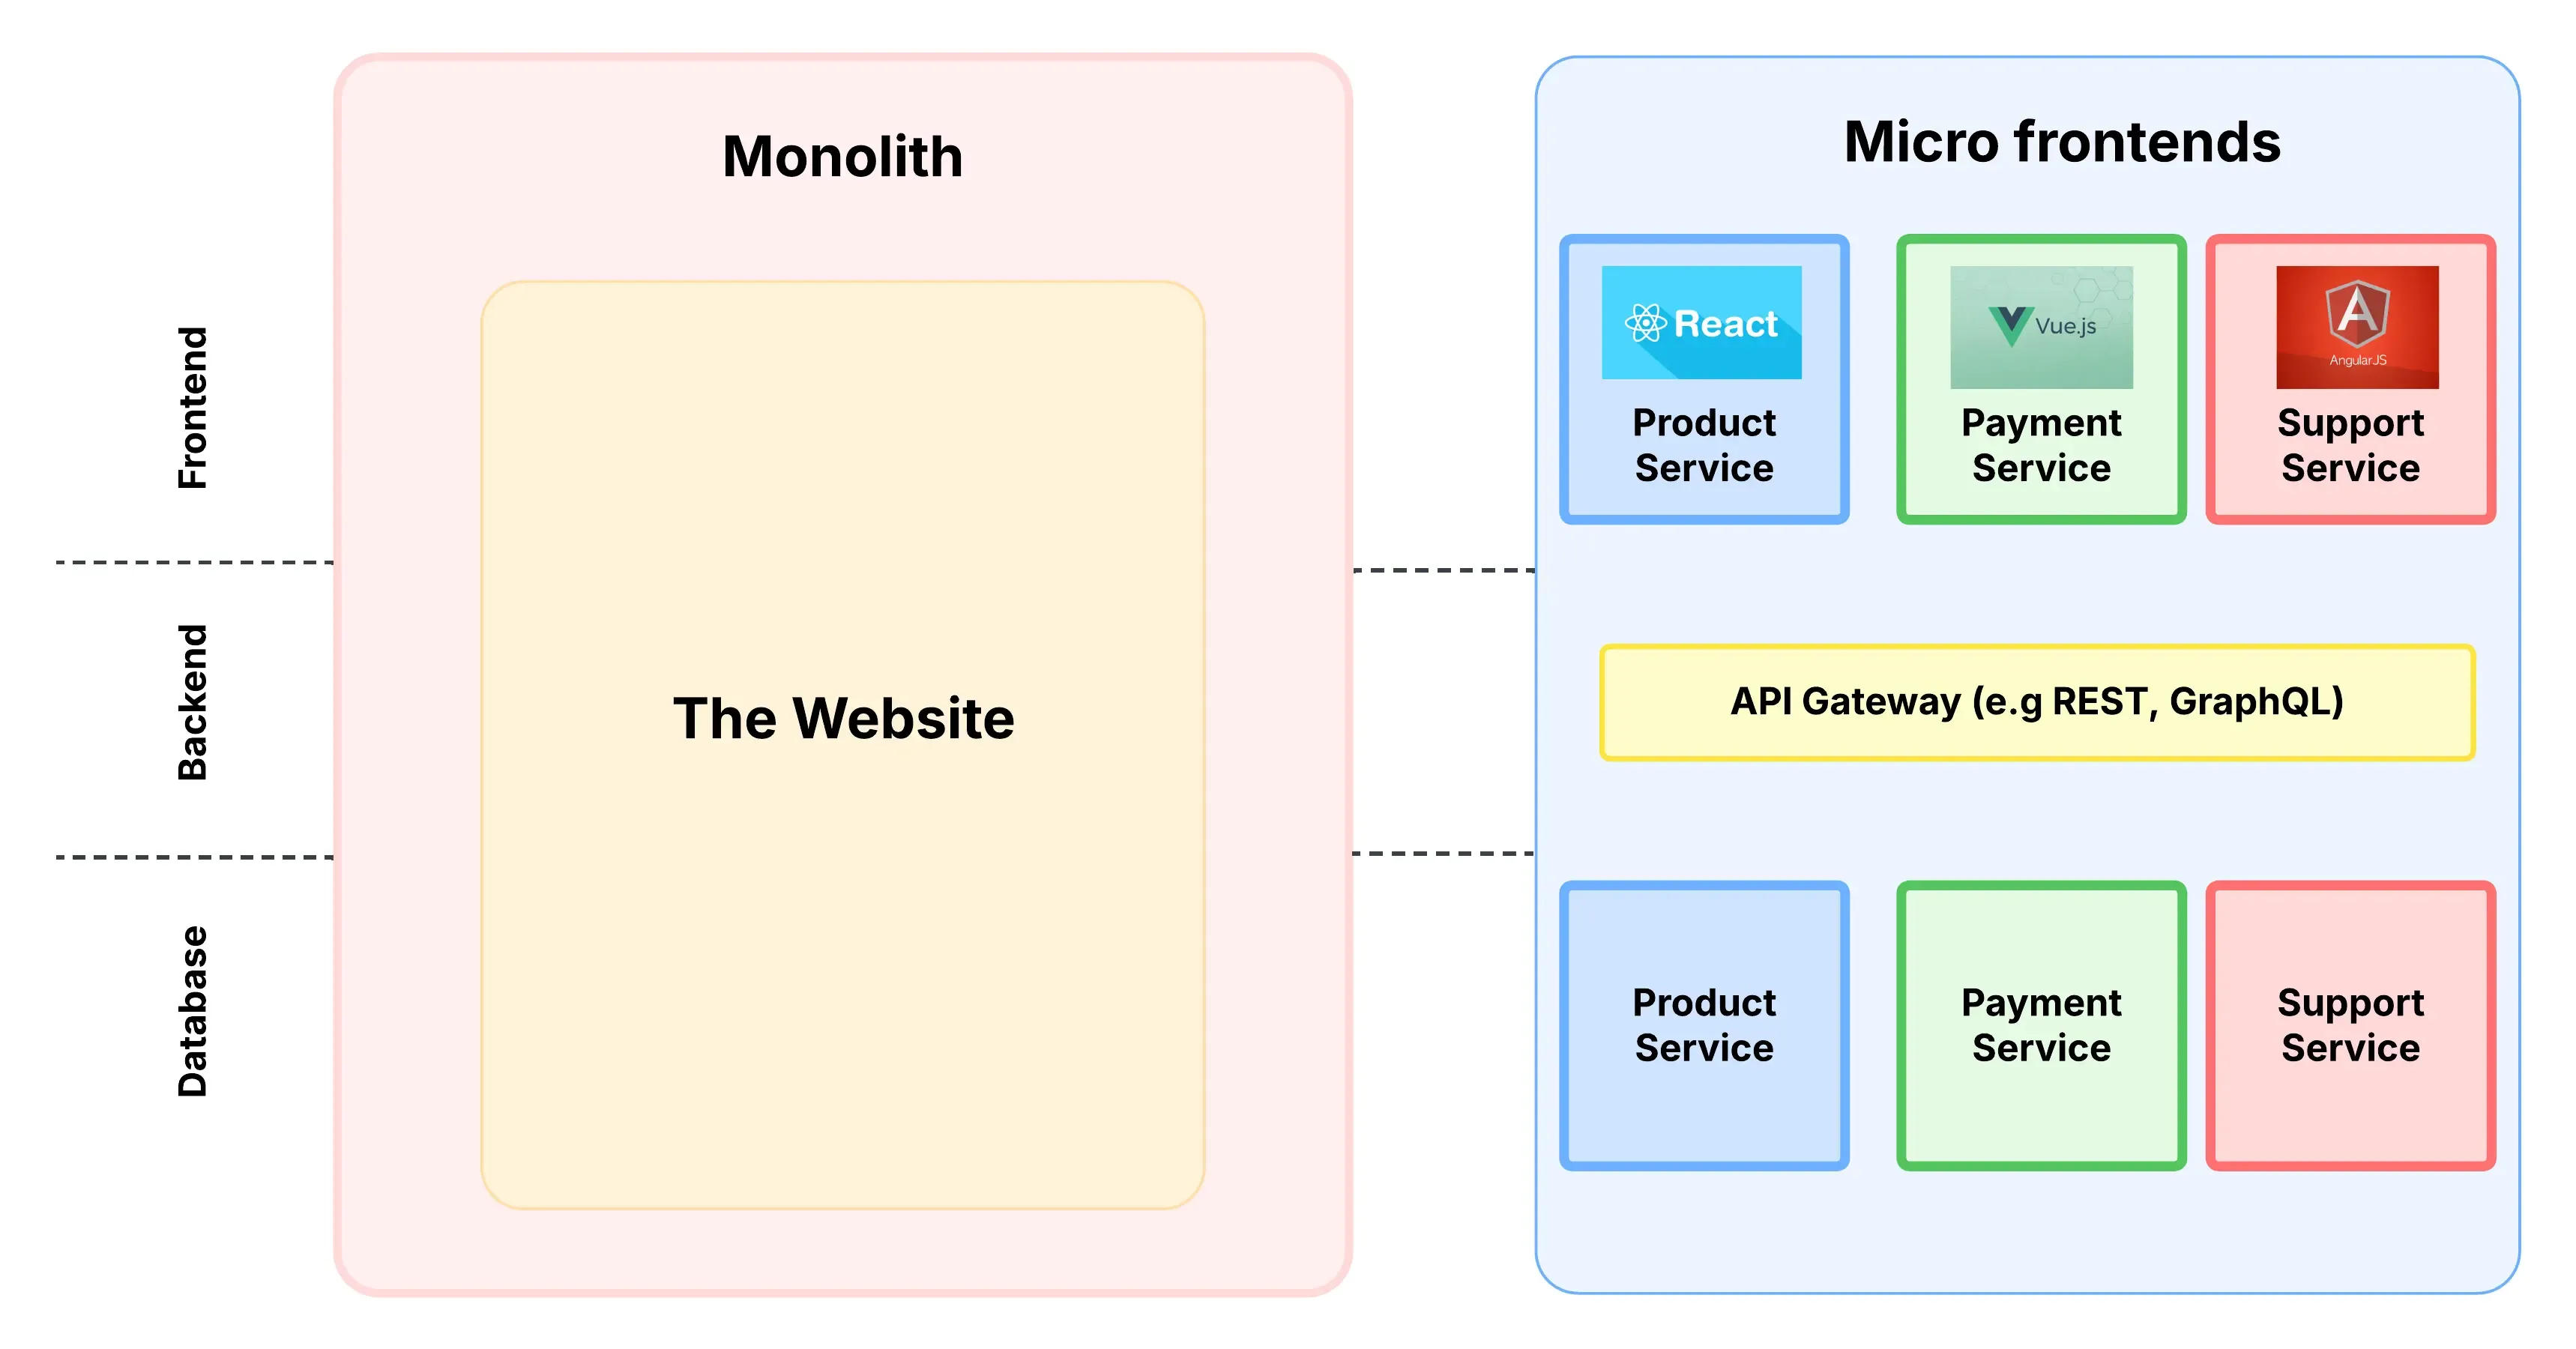
Microfrontends address this by splitting the frontend into smaller, independent modules that individual teams can develop and release separately.
- The product team can use React.
- The checkout team can work with Vue.js.
- The customer support team might prefer Angular.
Each team develops, tests, and deploys its module separately, ensuring faster releases, minimal disruptions, and improved scalability.
When and Why to Use Micro-Frontends
1. Scalability and Maintainability
Managing a large, monolithic frontend can be overwhelming, especially as an application expands. Micro-frontends break the system into smaller, self-contained units, making it easier to scale individual components based on demand. This modular structure also simplifies maintenance, as updates, bug fixes, or enhancements can be applied to a specific section without impacting the entire application.
2. Framework Freedom
One significant benefit of microfrontends is that different modules can be built using diverse technologies. Each module operates independently, giving teams the freedom to select the tools and frameworks that work best for their specific requirements. This flexibility allows developers to combine different technologies without concern for compatibility problems.
For example:
-
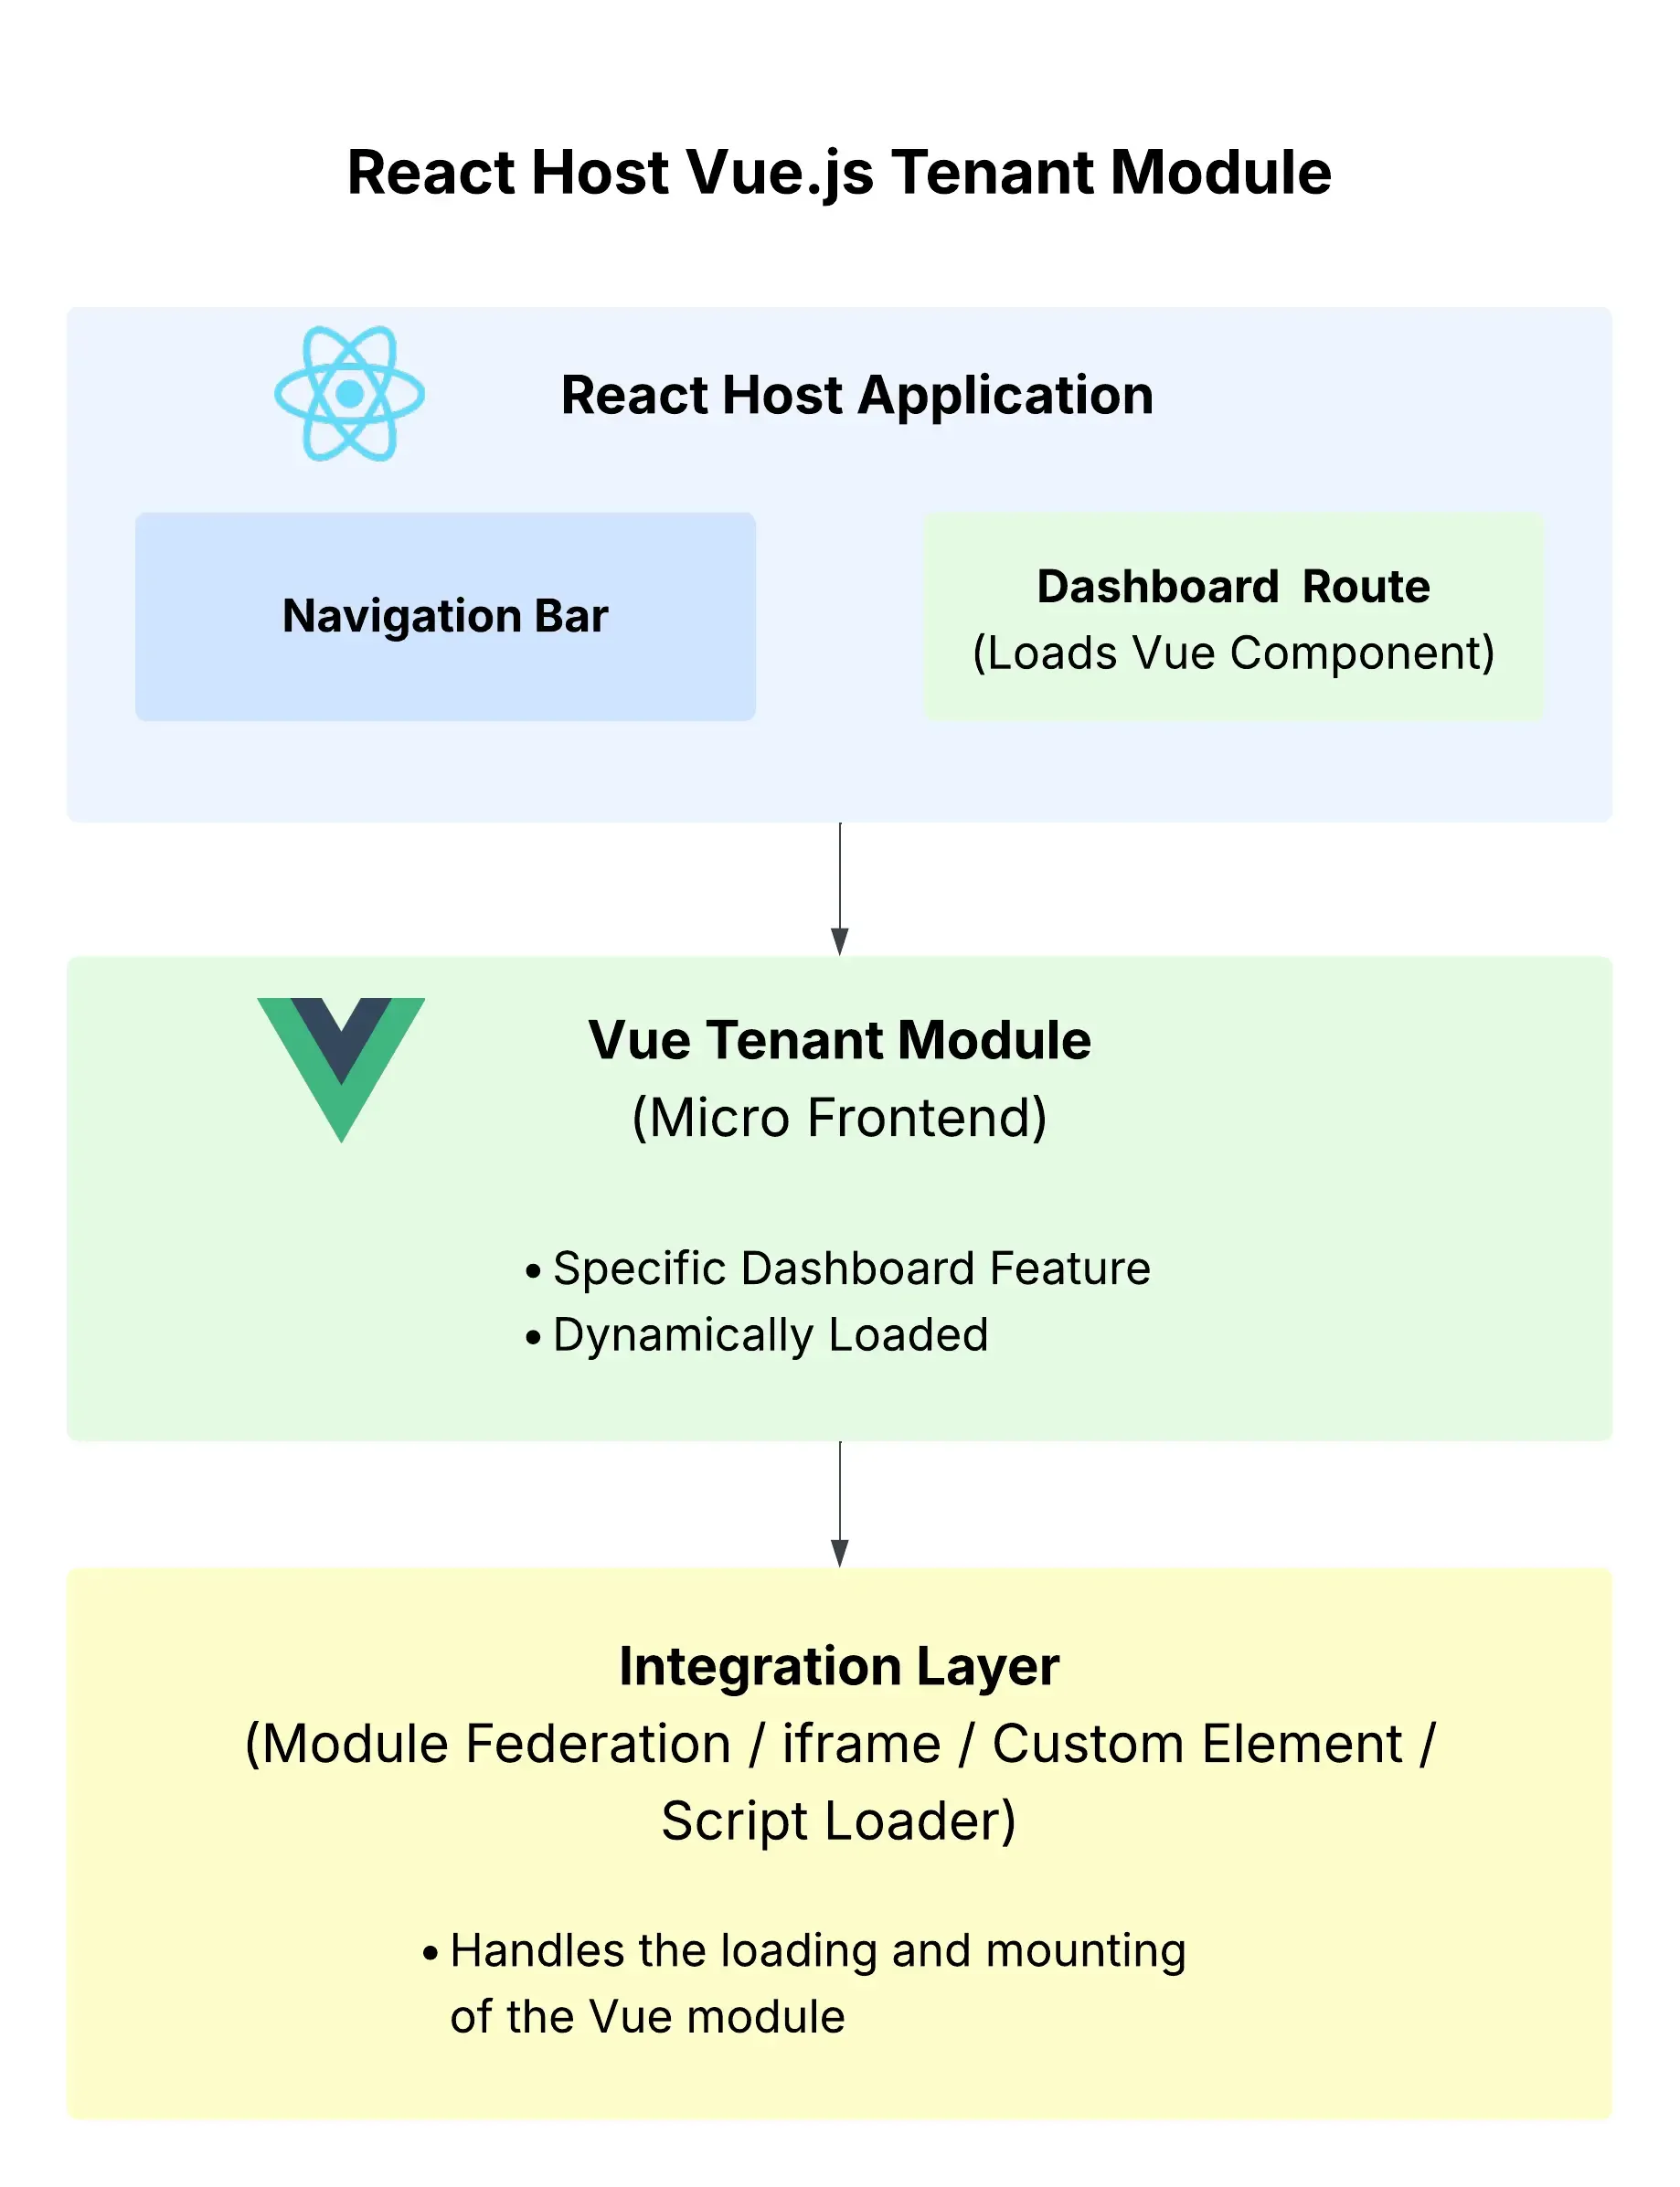
A React-based host application can integrate a Vue.js tenant module for a specific dashboard feature.
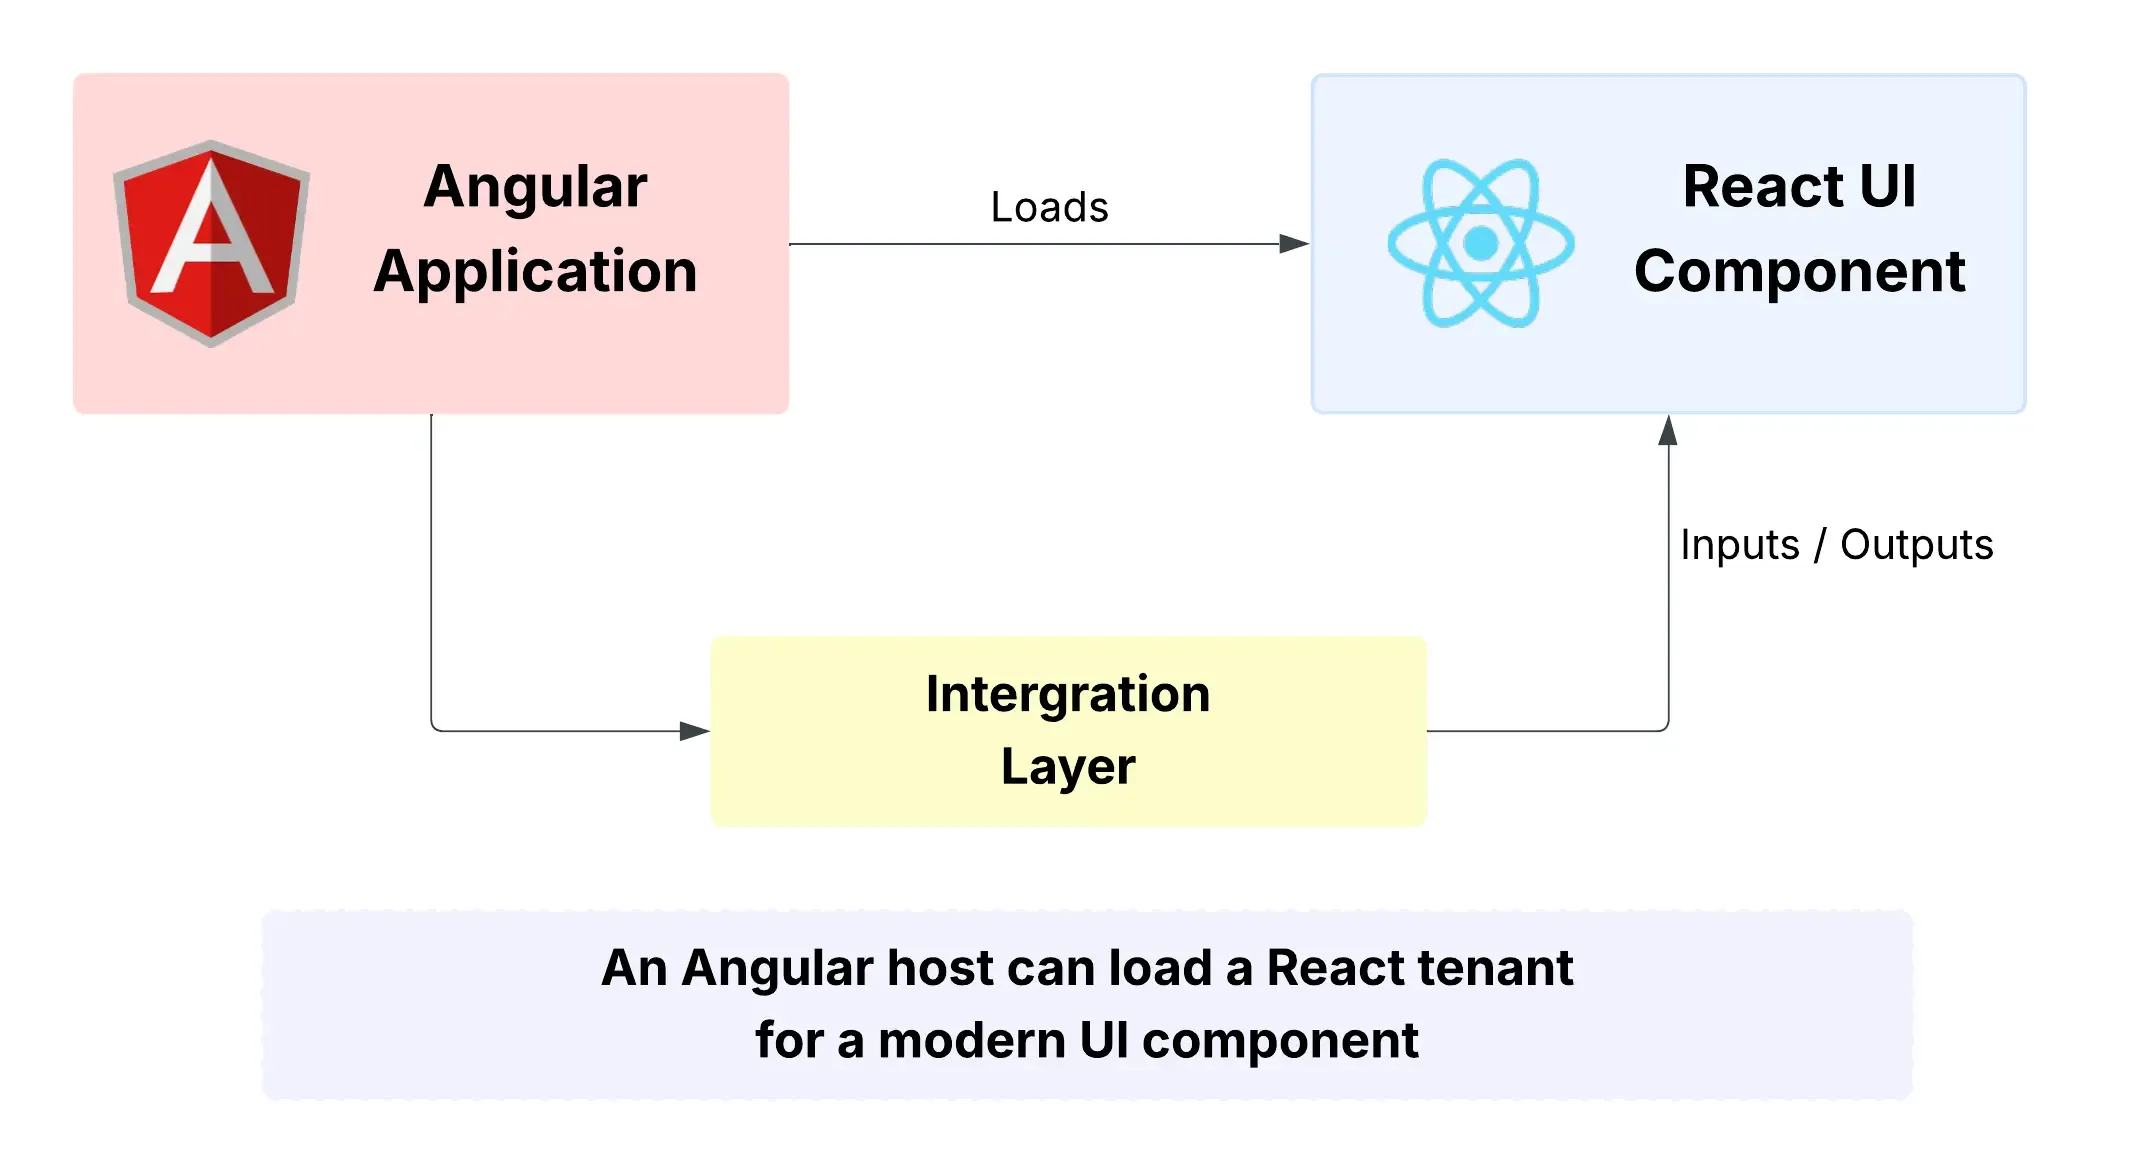
-
An Angular-based host application can integrate a React-based module to deliver a modern UI component.
-
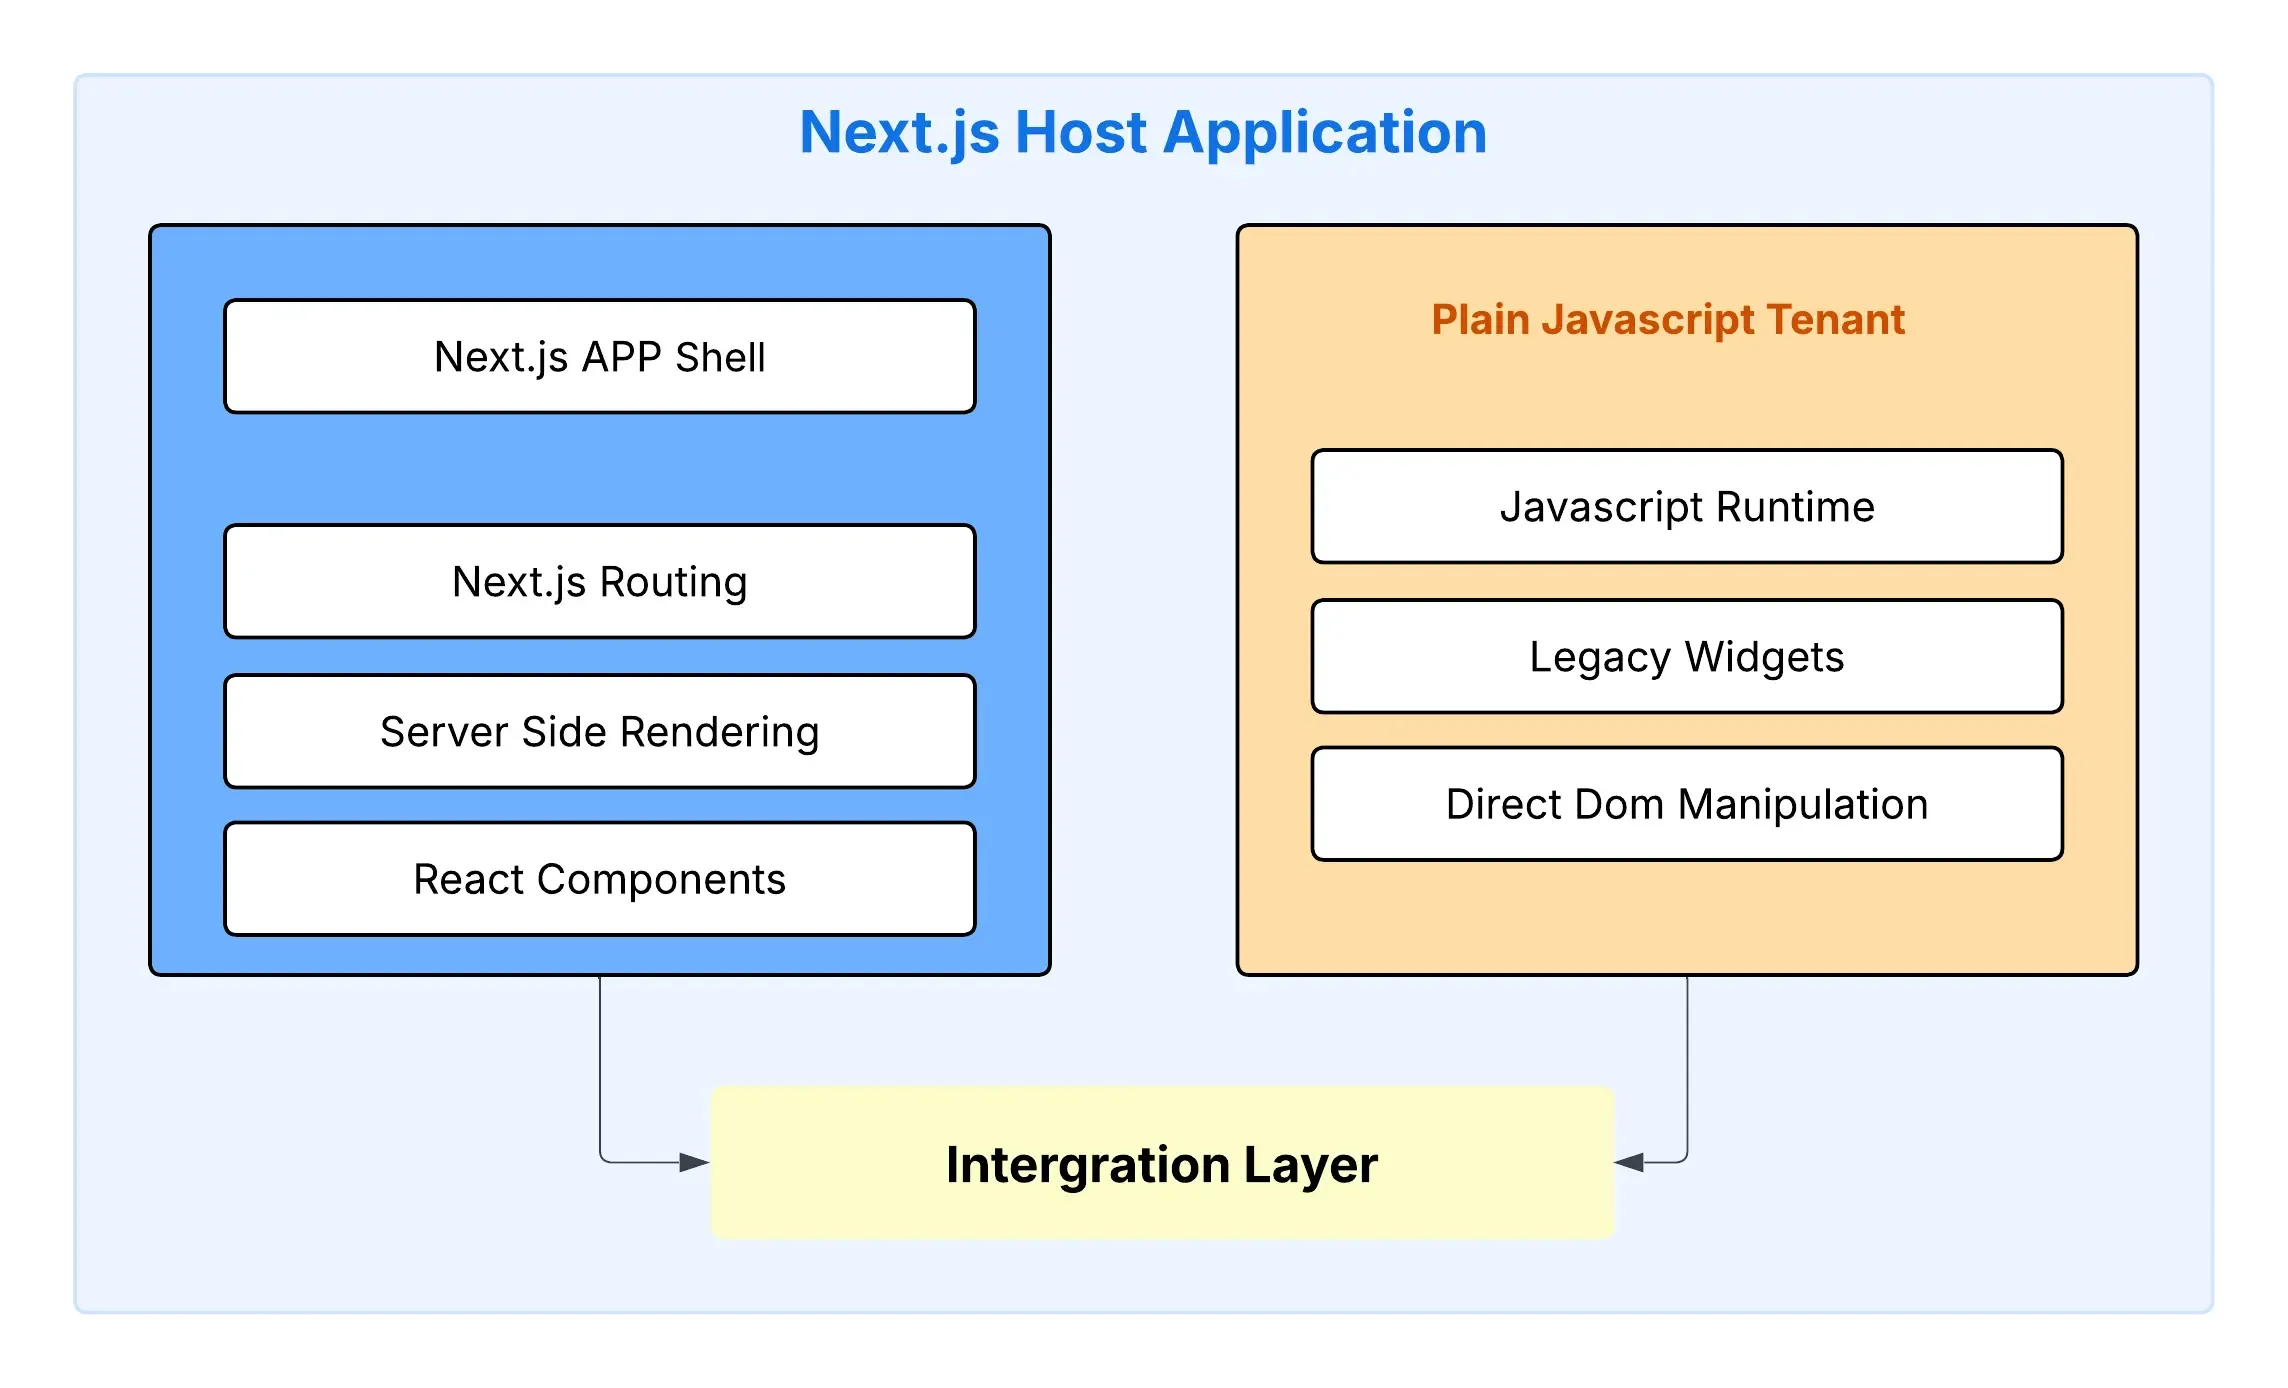
A Next.js host might pull in a plain JavaScript tenant to support legacy widgets.
-
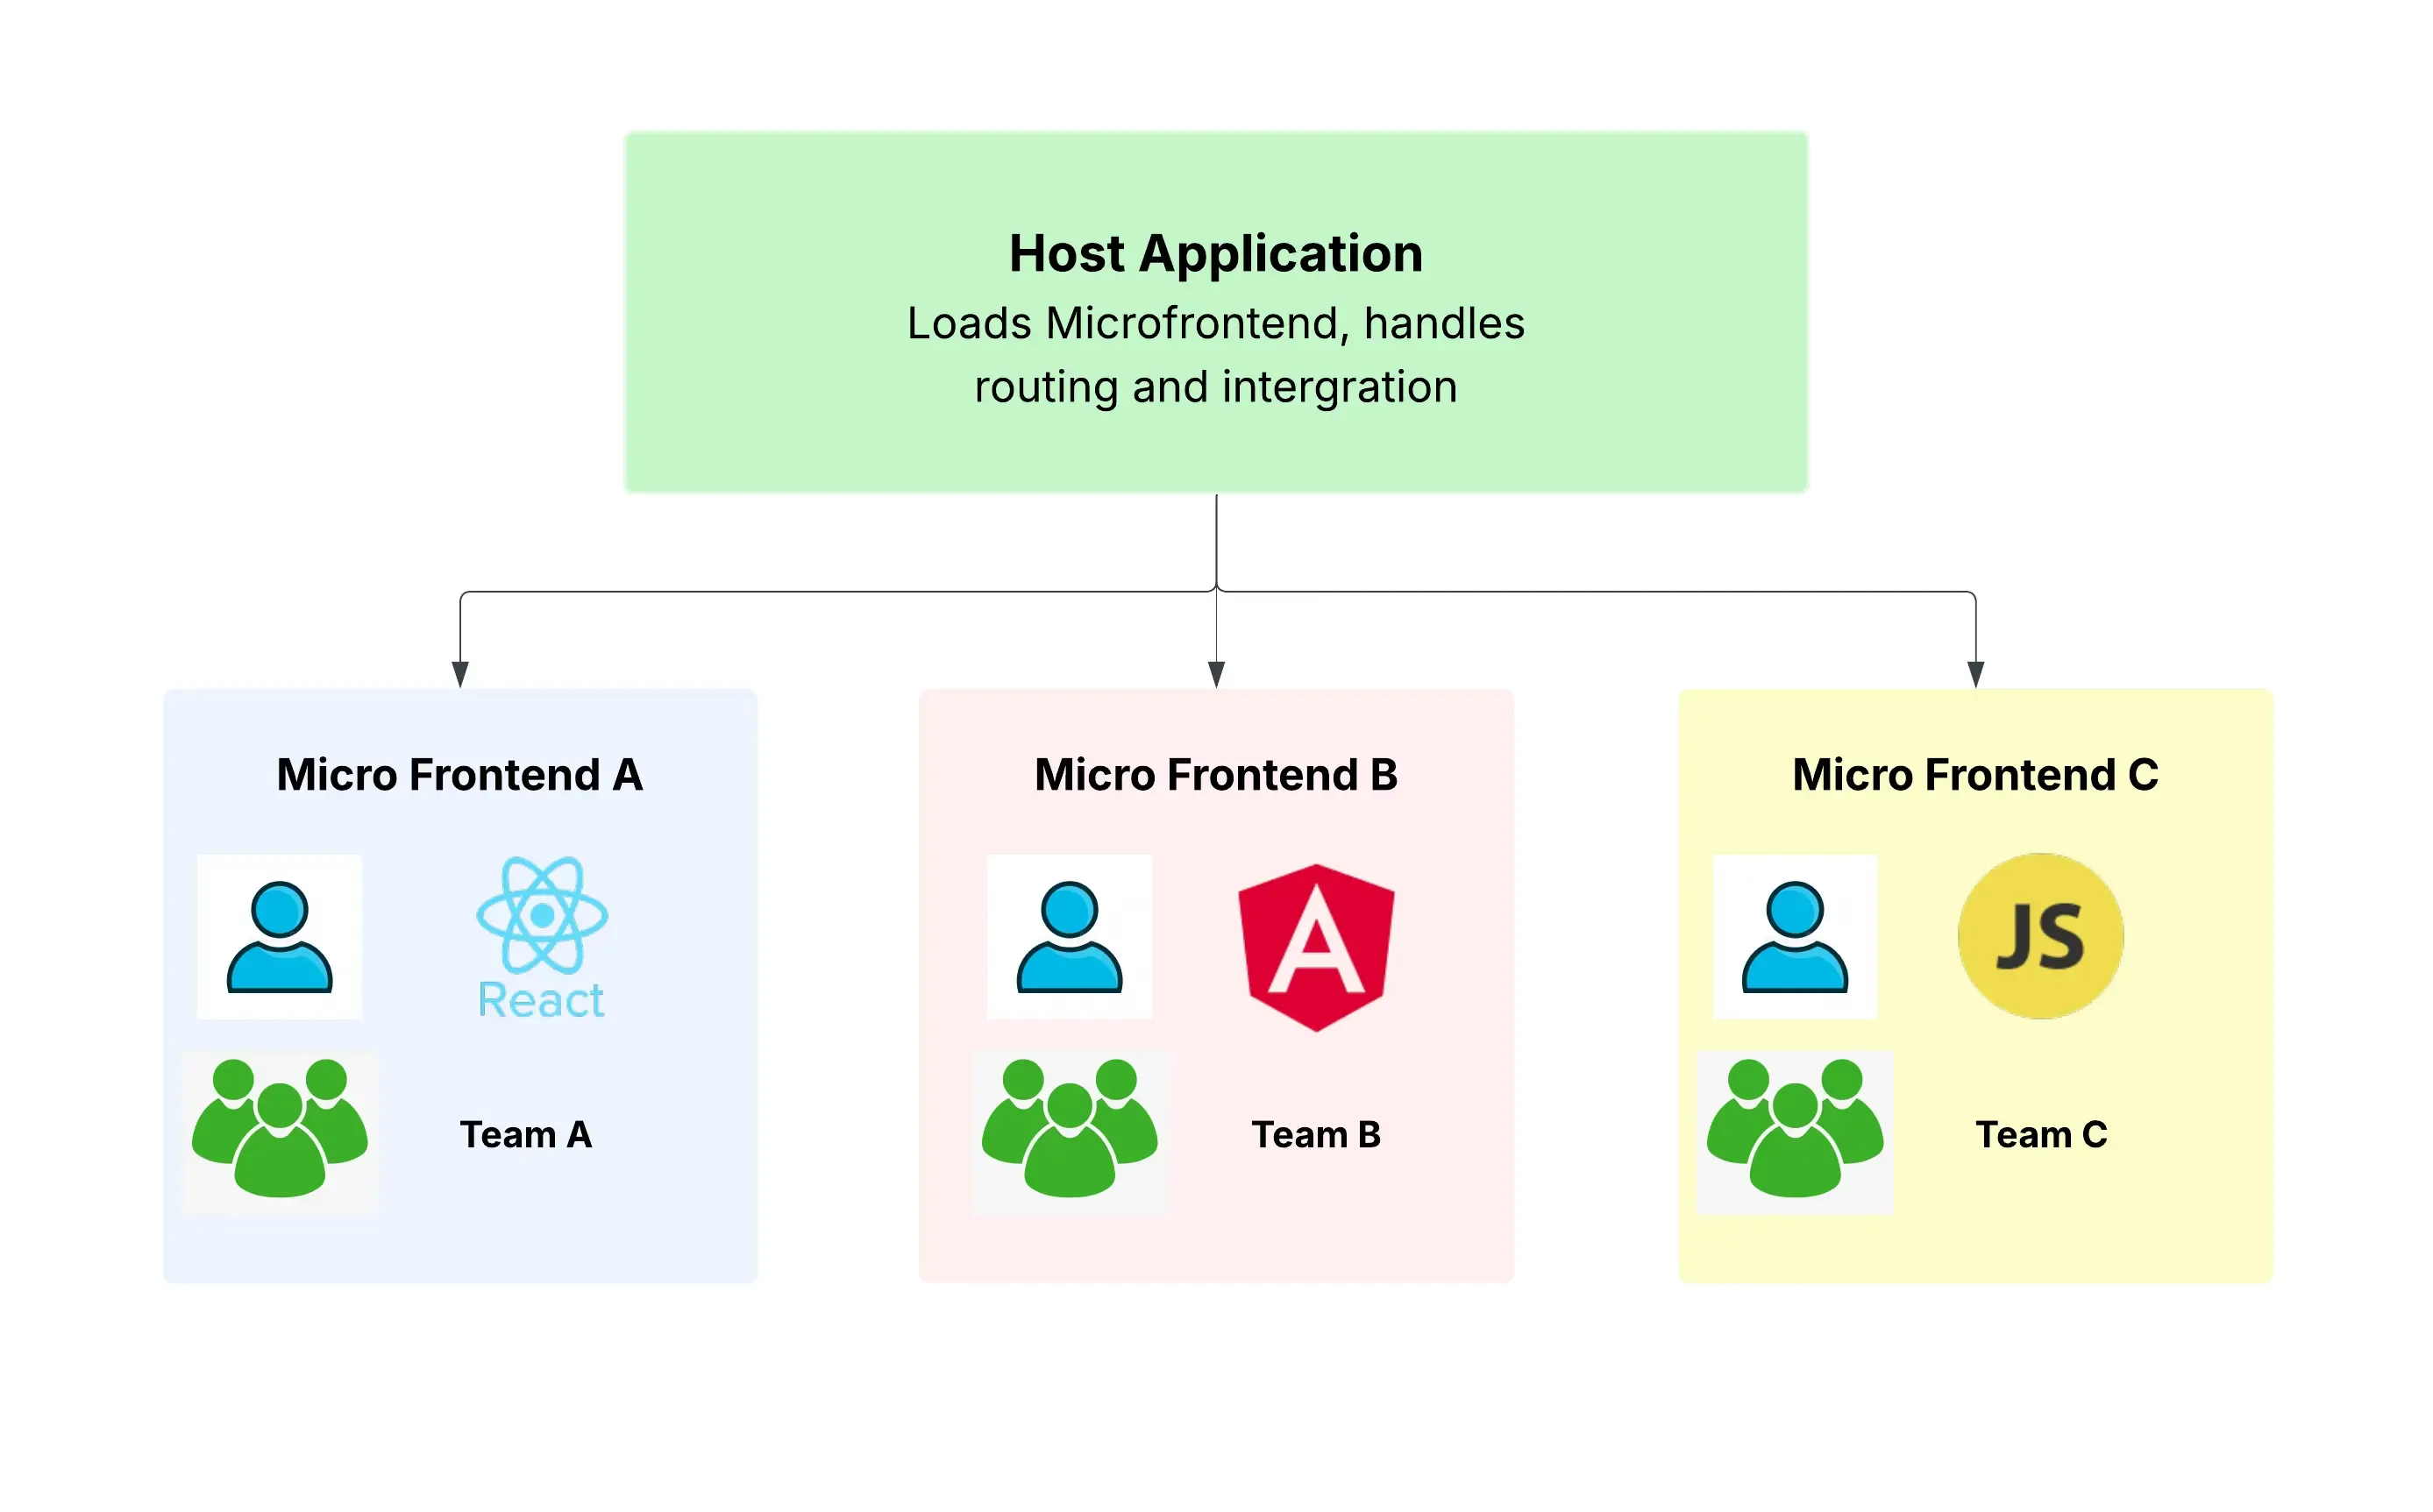
A Micro-frontend system could mix React, Angular, and Vanilla JS modules, allowing teams to maintain existing codebases while adopting new technologies where needed.
3. Faster Development and Deployment
With micro-frontends, different teams can work on various UI components simultaneously, eliminating dependencies that slow down development. Since each module operates independently, features can be rolled out faster without waiting for other sections to be completed. This speeds up the software development lifecycle and reduces downtime when deploying updates.
4. Enhanced Team Collaboration and Autonomy
For organizations with multiple development teams working on different parts of an application, micro-frontends promote autonomy. Each team can manage its own module independently, reducing bottlenecks and improving efficiency. By decentralizing ownership, teams can make decisions faster and align development with business goals more effectively.
When Should You Use Microfrontends?
Microfrontends are a powerful pattern, but they aren’t for everyone or every project.
Use microfrontends when:
- You have multiple teams working on different parts of a large frontend.
- Teams need autonomy to choose their tech stack or deploy independently.
- The project is complex enough that modularity brings real benefits.
- You expect frequent changes, and you want to reduce the risk of one team breaking another team’s code.
Avoid microfrontends when:
- You’re building a small or medium-sized application with a single team.
- Your architecture doesn’t require different frameworks or separate deployments.
- The overhead of managing multiple apps outweighs the benefits.
- Your team isn’t familiar with the additional complexity it brings.
Known Challenges of Microfrontends
Like any architecture, microfrontends come with trade‑offs. Some known downsides include:
-
State sharing between MFEs
Sharing data or application state (like user info or cart contents) across different microfrontends can be tricky. You’ll need to implement smart communication strategies.
-
Server‑Side Rendering (SSR)
If SEO or performance is a concern, SSR with microfrontends can be difficult to implement, especially when mixing multiple frameworks.
-
Increased complexity
More infrastructure, more coordination, and more setup. Microfrontends aren’t “free.” You need good DevOps practices and a solid understanding of module federation or similar technologies.
In this blog, we will walk through setting up a basic micro-frontend architecture using React. Our goal is to demonstrate how multiple micro-frontend applications can be composed together dynamically, without relying on bundlers like Webpack or transpilers like Babel. This approach will give you a deeper understanding of how micro-frontends can be structured, especially when you want to keep things lightweight and simple.
Setting Up Our Micro-Frontend Architecture
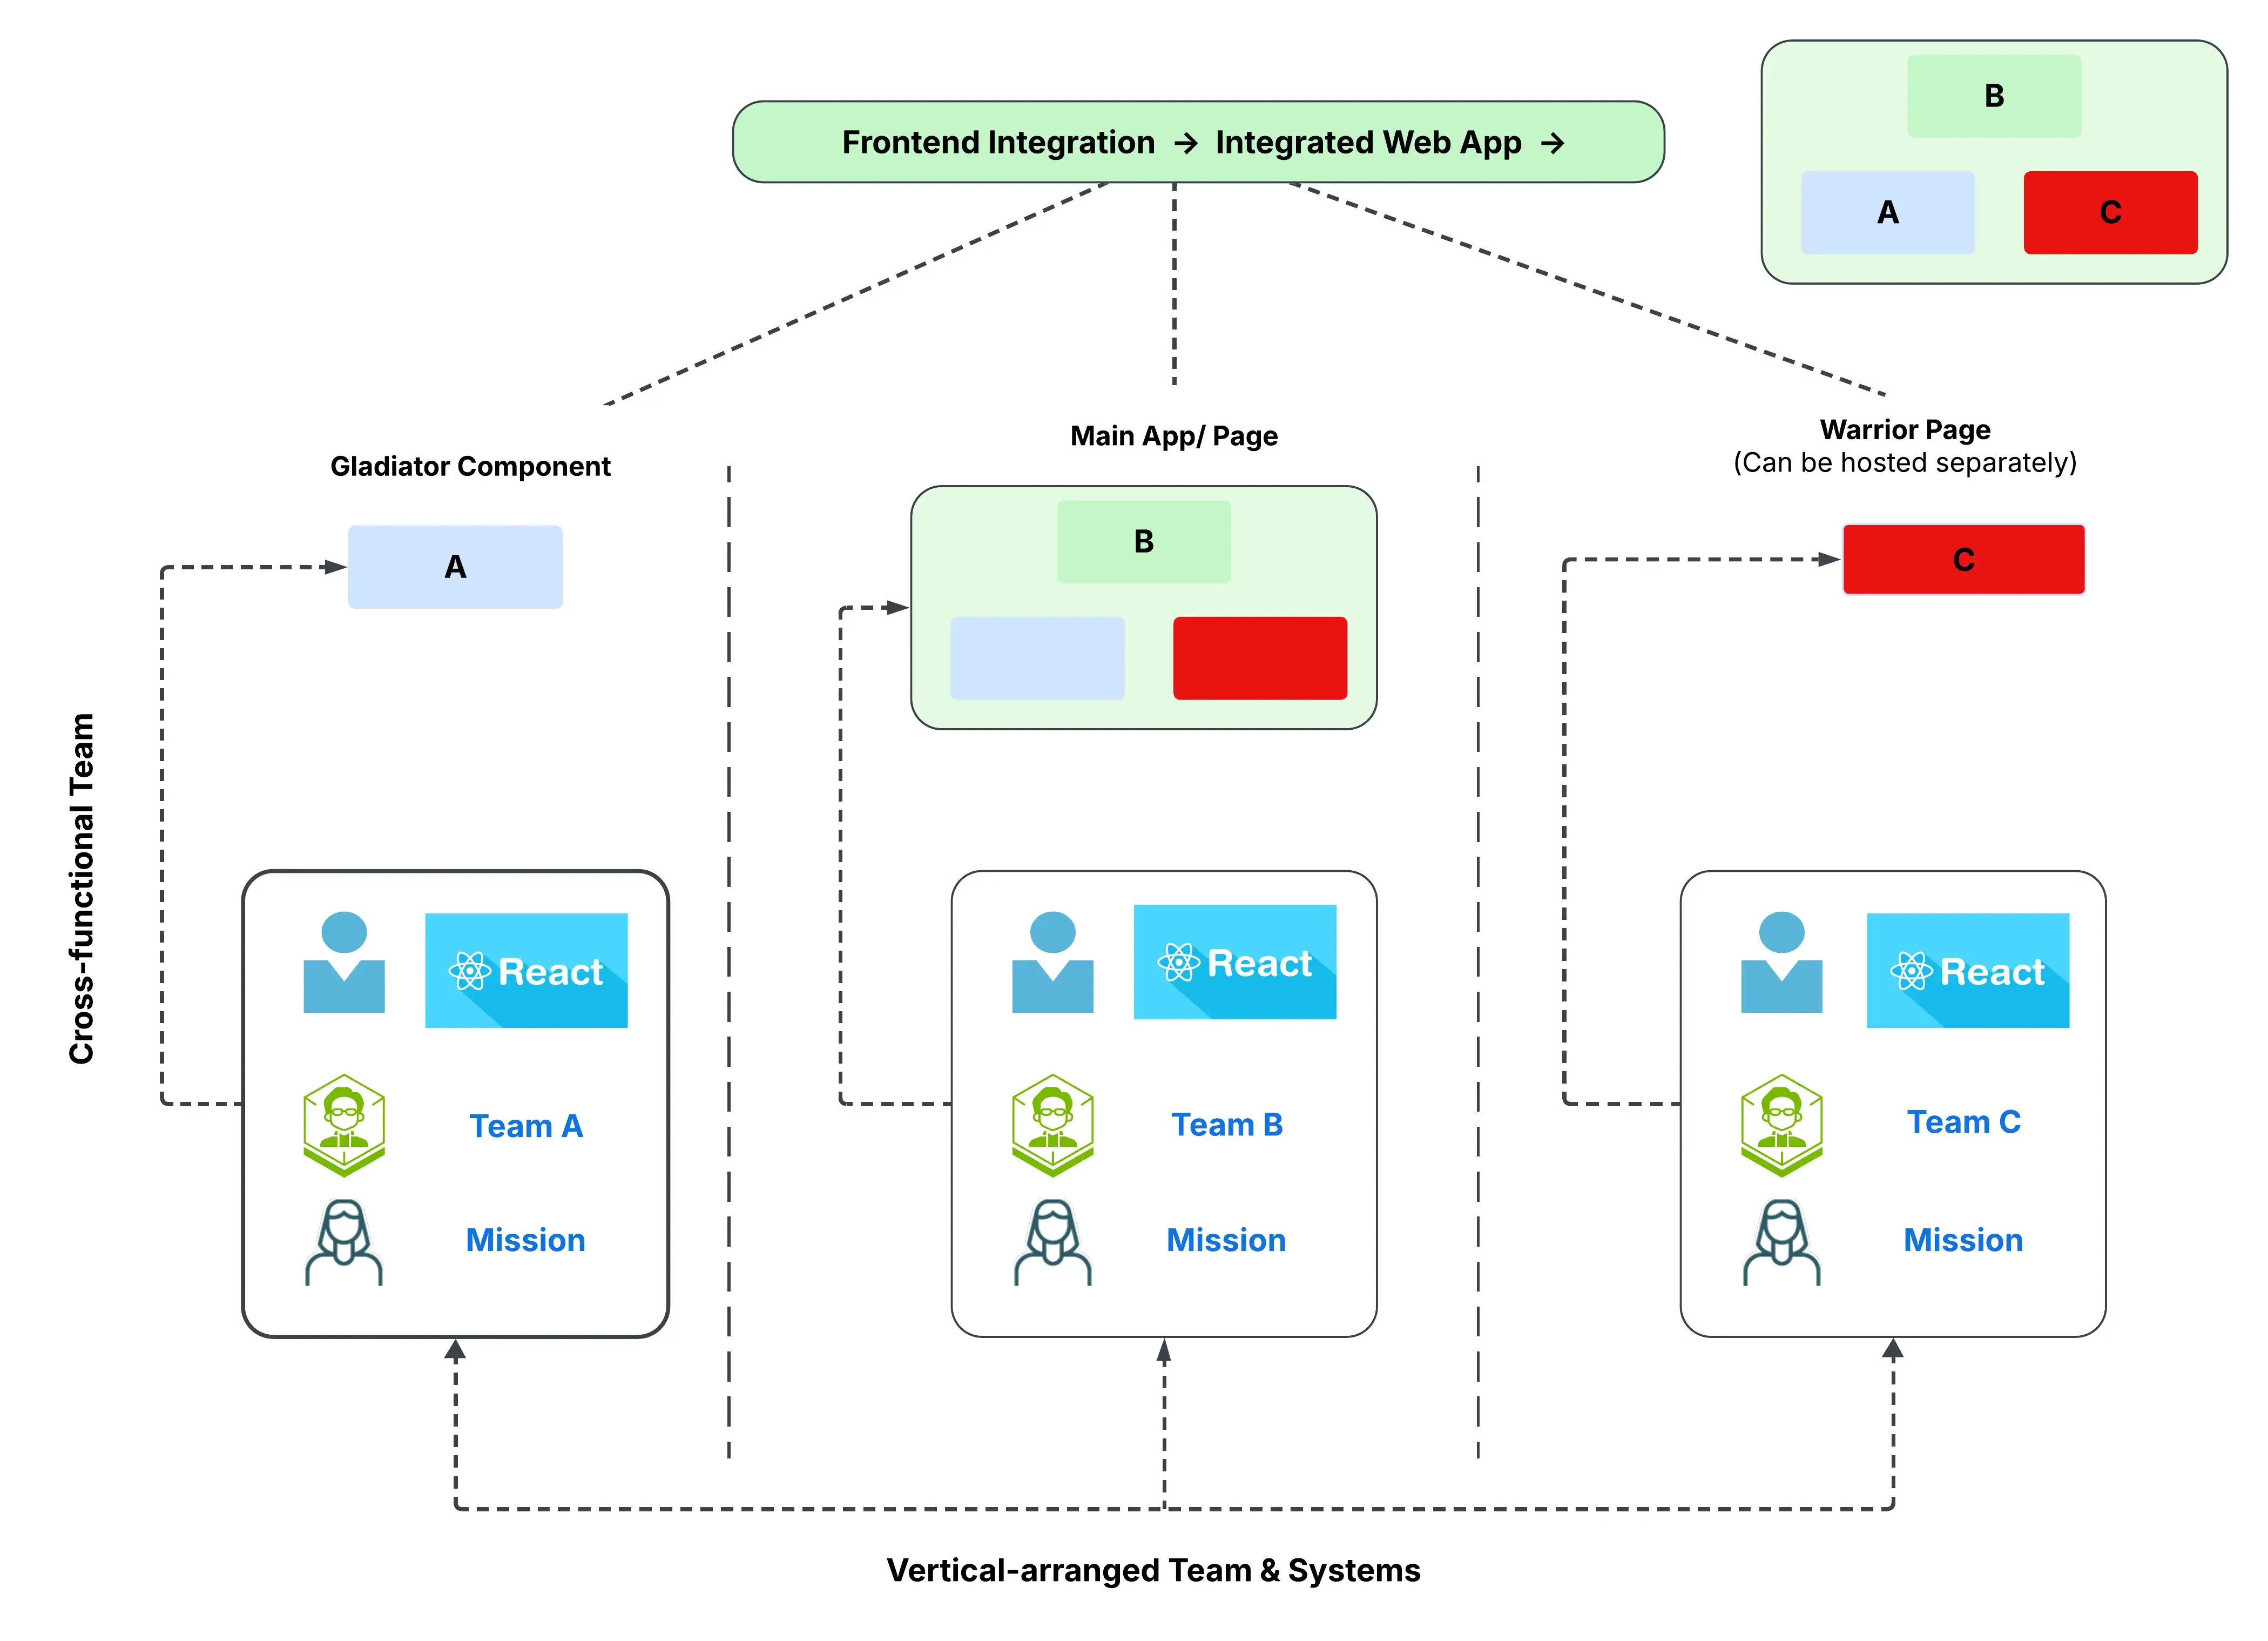
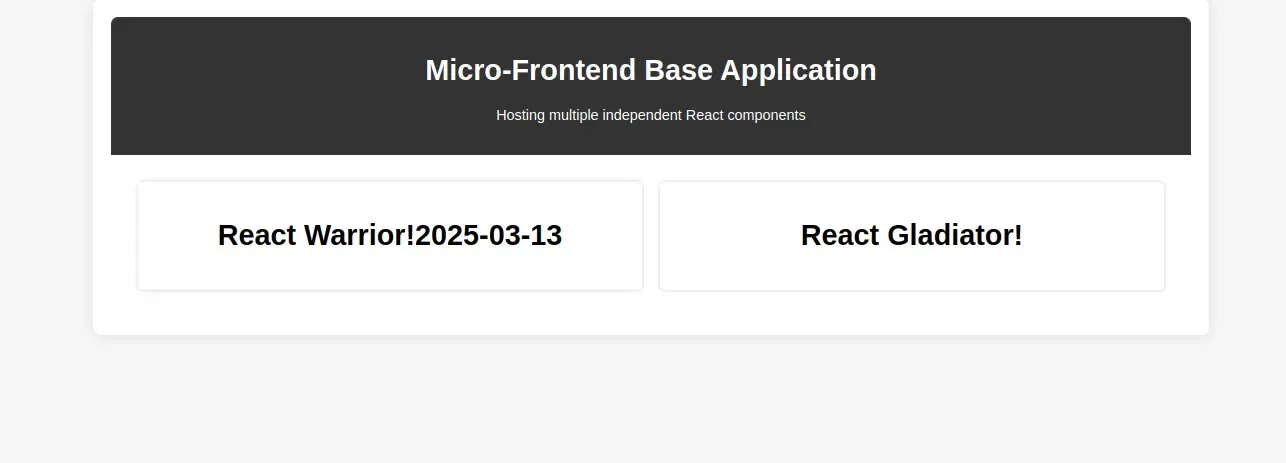
In our microfrontend setup, we have a base application that acts as the host, dynamically integrating two React applications Warrior and Gladiator. Let’s break down their roles:
- Base Application: Serves as the central hub, seamlessly loading and managing both Applications i.e. Warrior and Gladiator.
- Warrior: A versatile application that can function in two ways:
- It can be hosted independently as a standalone React app.
- It can also work as a tenant application, meaning it integrates within the base application when required.
- Gladiator: Unlike Warrior, Gladiator is designed to run exclusively within the microfrontend architecture
Let’s break down the entire process to create this setup…
1. Project Structure
# Microfrontend Project Structure

index.html  /* Entry point for Microfrontend */
app.js
Gladiator/
  ├── Gladiator.js
Warrior/
  ├── Warrior.js
  ├── index.html  /* Entry point for Warrior application */
  ├── warrior-scripts.js
2. Creating the Base Application (index.html)
The index.html file serves as the main container for our micro frontend application. It defines the foundational structure, loads external React dependencies, and dynamically injects micro frontend modules. This setup ensures seamless integration of independently developed applications into a unified architecture.
Key Highlights:
- Basic HTML Structure:
- Establishes a clean and structured layout with a dedicated root container (
#root) where microfrontends application will be injected dynamically.
- Establishes a clean and structured layout with a dedicated root container (
- Loading External Dependencies:
- Includes React and ReactDOM via CDN to eliminate bundling overhead and simplify dependency management.
- Microfrontend Application Integration:
- Loads the main application script (
app.js) to handle the rendering and integration of the microfrontend application.
- Loads the main application script (
- Loading Dependencies for Warrior App:
- Includes warrior-scripts.js, which dynamically loads additional dependencies needed for the Warrior application
index.html
…
 <body>
   <div id="root"></div>

   <script src="https://unpkg.com/react@18/umd/react.production.min.js"></script>
   <script src="https://unpkg.com/react-dom@18/umd/react-dom.production.min.js"></script>

   <script type="module" src="./Warrior/warrior-scripts.js"></script>
   <script type="module" src="app.js"></script>
 </body>
…
3. Base React Application (app.js)
The app.js file serves as the core of our microfrontend application. It defines the main layout, creates placeholders for each microfrontend application, and dynamically loads the microfrontend components using module imports
Key Highlights:
- Defining Microfrontend Roots:
- Creates
#warrior-rootand#gladiator-root, which act as mounting points for the respective microfrontends.
- Creates
- Building the React Layout:
- Uses
React.createElementto generate the UI dynamically without JSX.
- Uses
- Dynamically Importing Microfrontends:
- Uses the
import()function to asynchronously loadWarriorandGladiatorreact applications. - Renders imported components inside their respective mounting points.
- Uses the
app.js
const createElement = React.createElement;

const Header = () =>
 createElement("div", { className: "header" },
   createElement("h1", null, "Micro-Frontend Base Application"),
   createElement("p", null, "Hosting multiple independent React components")
 );

const MicroFrontends = () =>
 createElement("div", { className: "microfrontends" },
   createElement("div", { className: "module", id: "warrior-root" }),
   createElement("div", { className: "module", id: "gladiator-root" })
 );

const App = () => createElement("div", { className: "container" }, createElement(Header), createElement(MicroFrontends));

ReactDOM.render(createElement(App), document.getElementById("root"));

// Dynamically import the micro-frontends and render them
const renderMicroFrontend = (modulePath, elementId) => {
 import(modulePath).then(module => {
   const Component = module[Object.keys(module)[0]]; // Assumes default or named export
   ReactDOM.render(createElement(Component), document.getElementById(elementId));
 });
};

renderMicroFrontend('./Warrior/Warrior.js', 'warrior-root');
renderMicroFrontend('./Gladiator/Gladiator.js', 'gladiator-root');
4. Creating the Gladiator React App
The Gladiator.js file exports a simple React component that will be loaded dynamically into our host application.
Key Highlights:
- Uses
React.createElementto define a functional component. - Does not rely on external dependencies.
- Will be dynamically imported into
app.js.
Gladiator.js
const createElement = React.createElement;
export const Gladiator = () =>
 createElement("div", null, createElement("h1", null, "React Gladiator!"));
5. Creating the Warrior React App
5.1. Warrior Index Page (index.html)
- The index.html file serves as the entry point for the Warrior micro-frontend.
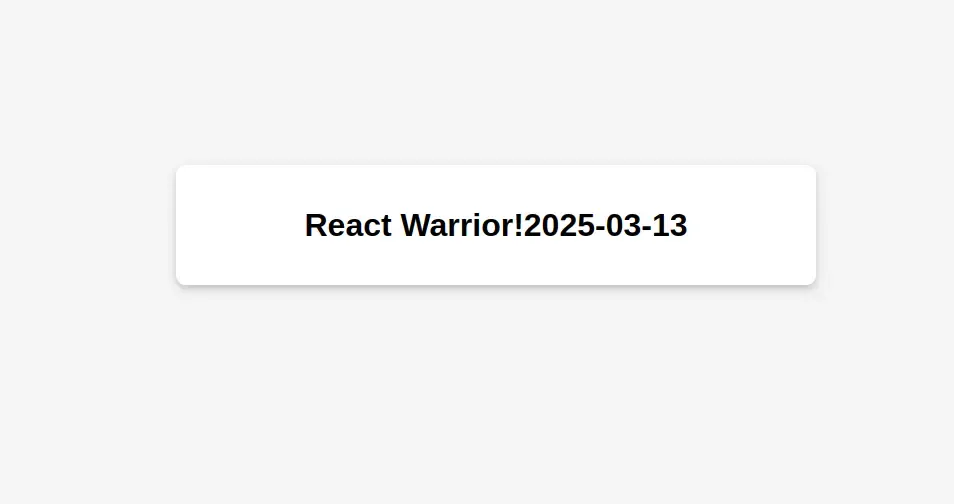
- The Warrior component is unique compared to the Gladiator application. It can function either as a standalone application, or as a micro-component that integrates with a base application.
- It loads the necessary scripts and mounts the Warrior component inside the #warrior-root div.
- External script (warrior-scripts.js) is loaded to handle dependencies and render the component.
index.html
 …
<body>
  <div id='warrior-root'></div>

  <script src="https://unpkg.com/react@18/umd/react.production.min.js"></script>
  <script src="https://unpkg.com/react-dom@18/umd/react-dom.production.min.js"></script>


  <script type="module">
    import { Warrior } from "./Warrior.js";
    const warriorScript = document.createElement('script');
    warriorScript.src = 'warrior-scripts.js';
    warriorScript.type = 'text/javascript';
    document.head.appendChild(warriorScript);
    warriorScript.onload = function() {
      // Render once dependencies are loaded
      ReactDOM.render(React.createElement(Warrior), document.getElementById('warrior-root'));
    };
  </script>
</body>
 …
5.2. Warrior Application Component (Warrior.js)
- This is a simple React component that displays a heading along with the current date.
- Moment.js is used to format and display the current date.
- Since Webpack and Babel are not used, React’s built-in
createElementmethod is leveraged.
Warrior.js
export const Warrior = () => {
   return React.createElement(
       'div',
       null,
       React.createElement(
           'h1',
           null,
           'React Warrior!'
           + new moment().format("YYYY-MM-DD")
       )
   );
};
5.3. Loading External Dependencies (warrior-scripts.js)
- Moment.js is added as a script element in the document head.
warrior-scripts.js
// warrior specific dependencies here.
const momentScript = document.createElement('script');
momentScript.src = 'https://unpkg.com/moment@2.29.1/min/moment.min.js';
momentScript.type = 'text/javascript';
document.head.appendChild(momentScript);
6. Running Microfrontends Locally with Python’s Simple HTTP Server
Since React scripts aren’t loading directly, we need a way to serve these applications properly. A quick and easy solution is Python’s built-in HTTP server, which allows us to run multiple applications on different ports.
6.1: Start the Server for the Main Microfrontend
-
Open a terminal and navigate to the folder containing the
index.htmlfile of the microfrontend:cd /path/to/microfrontend -
Start a simple HTTP server on port 3000:
python3 -m http.server 3000 -
Now, you can access the microfrontend at: http://localhost:3000
6.2: Start the Server for the Warrior Application
-
Open a new terminal and go to the folder of the Warrior application:
cd /path/to/microfrontend/Warrior -
Start another HTTP server on port 3001:
python3 -m http.server 3001 -
The Warrior application will be available at: http://localhost:3001
Conclusion
There you have it! This micro-frontend architecture demonstrates how we can structure and load independent micro-frontends without using Webpack, or Babel. We dynamically import modules, load dependencies separately, and mount them into the base application.
In the next blog, we will explore how to implement micro-frontends using React with Webpack and Babel to optimize performance and improve developer experience.
Stay tuned!
GitHub Repository: microfrontend-basic-setup 🔗